
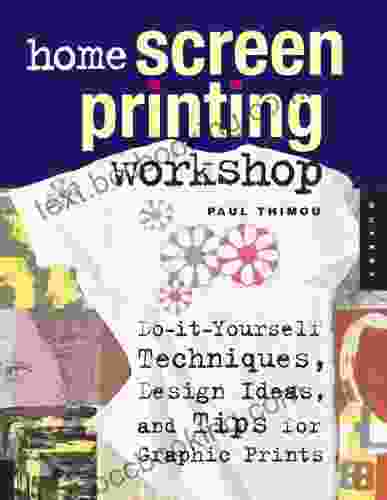
Home Screen Printing Workshop: The Ultimate Guide to Screen Printing at Home

Screen printing is a versatile and rewarding craft that can be used to create beautiful and unique prints on a variety of surfaces. This workshop will teach you everything you need to know to start screen printing at home, from setting up your equipment to printing on different surfaces.
What is screen printing?
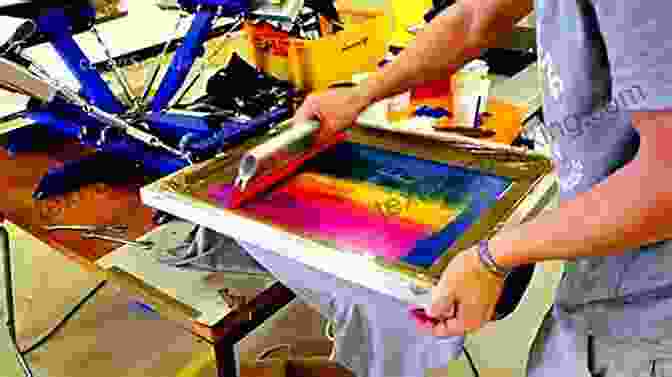
Screen printing is a printing technique that uses a stencil to create a design on a surface. The stencil is made by exposing a light-sensitive emulsion to light through a positive or negative of the design. The exposed emulsion hardens, creating a barrier that prevents ink from passing through. The unexposed emulsion is washed away, leaving the design in the screen. Ink is then applied to the screen and forced through the open areas of the stencil onto the surface below.
4.1 out of 5
| Language | : | English |
| File size | : | 9489 KB |
| Text-to-Speech | : | Enabled |
| Screen Reader | : | Supported |
| Enhanced typesetting | : | Enabled |
| Print length | : | 128 pages |
What are the benefits of screen printing?
Screen printing offers a number of benefits over other printing techniques, including:
- Versatility: Screen printing can be used to print on a wide variety of surfaces, including paper, fabric, metal, glass, and wood.
- Durability: Screen printed designs are durable and long-lasting, making them ideal for applications such as t-shirts, posters, and signs.
- Affordability: Screen printing is a relatively affordable printing technique, especially when printing large quantities.
- Creativity: Screen printing allows you to create unique and custom designs that are not possible with other printing techniques.
What do I need to get started?
To get started with screen printing, you will need the following equipment:
- Screen printing frame: This is the frame that will hold the screen in place.
- Screen printing screen: This is the mesh that will be used to transfer the ink to the surface.
- Light-sensitive emulsion: This is the emulsion that will be used to create the stencil.
- Exposure unit: This is the device that will expose the emulsion to light.
- Washout booth: This is the area where the unexposed emulsion will be washed away.
- Ink: This is the ink that will be used to create the print.
- Squeegee: This is the tool that will be used to force the ink through the screen.
How do I create a screen print?
The process of creating a screen print is as follows:
- Create your design: The first step is to create your design. You can use a computer program, draw your design by hand, or find a pre-made design online.
- Create a positive or negative of your design: Once you have your design, you need to create a positive or negative of it. A positive is a black design on a clear background, while a negative is a clear design on a black background. You can create a positive or negative using a variety of methods, such as using a photocopier, printing your design onto transparency film, or cutting out your design from black paper.
- Coat the screen with emulsion: The next step is to coat the screen with light-sensitive emulsion. This can be done using a variety of methods, such as using a scoop coater or a roller. Once the screen is coated, it needs to be dried in a dark room.
- Expose the screen to light: Once the emulsion is dry, it is time to expose the screen to light. This is done by placing the positive or negative of your design on the screen and exposing it to light using an exposure unit. The light will harden the emulsion in the areas that are not covered by the positive or negative, creating a stencil.
- Wash out the unexposed emulsion: Once the screen has been exposed, it is time to wash out the unexposed emulsion. This is done by spraying the screen with water and using a soft brush to remove the unexposed emulsion. Once the unexposed emulsion has been washed away, the stencil will be complete.
- Print your design: The final step is to print your design. To do this, you will need to apply ink to the screen and use a squeegee to force the ink through the open areas of the stencil onto the surface below. Once the ink has been applied, you can remove the screen and allow the print to dry.
Tips for screen printing
Here are a few tips for screen printing:
- Use high-quality materials: The quality of your prints will depend on the quality of your materials. Be sure to use high-quality screens, emulsion, and ink.
- Take your time: Screen printing is a process that takes time and patience. Don't rush through any of the steps, and be sure to let the emulsion dry completely before exposing it to light.
- Experiment: Screen printing is a versatile craft that allows you to experiment with different techniques and materials. Try different inks, screens, and surfaces to see what works best for you.
- Have fun: Screen printing is a fun and rewarding craft. Don't be afraid to experiment and have fun with it.
Screen printing is a versatile and rewarding craft that can be used to create beautiful and unique prints on a variety of surfaces. This workshop has provided you with the basic knowledge and skills you need to get started with screen printing at home. With a little practice, you can create your own custom prints that will be sure to impress your friends and family.
Free Download your copy of the Home Screen Printing Workshop today!
4.1 out of 5
| Language | : | English |
| File size | : | 9489 KB |
| Text-to-Speech | : | Enabled |
| Screen Reader | : | Supported |
| Enhanced typesetting | : | Enabled |
| Print length | : | 128 pages |
Do you want to contribute by writing guest posts on this blog?
Please contact us and send us a resume of previous articles that you have written.
 Book
Book Novel
Novel Page
Page Chapter
 Text
Text Story
Story Genre
Genre Reader
 Library
 Paperback
 E-book
 Magazine
 Newspaper
 Paragraph
 Sentence
 Bookmark
 Shelf
Shelf Glossary
 Bibliography
 Foreword
 Preface
 Synopsis
 Annotation
 Footnote
 Manuscript
 Scroll
 Codex
Codex Tome
Tome Bestseller
 Classics
 Library card
 Narrative
 Biography
 Autobiography
 Memoir
 Reference
 Encyclopedia
 Shirley Blancke
 Ryan Smithson
 Richard M Levy
 Roger Williams
 Mark Jones
 Mark Mcconville
 Matthew Jude Barker
 Robert C Smith
 Victor Manibo
 Mary Logue
 Megan Smolenyak
 Marta Obiols Llistar
 Virginia Loh Hagan
 Rupert Sheldrake
 Marty Neumeier
 Maxwell Ayrton
 Maria Elena Alonso Sierra
 Mariel Hemingway
 Mary Ann Winkowski
 Marissa Cox
Light bulbAdvertise smarter! Our strategic ad space ensures maximum exposure. Reserve your spot today!


 Joseph ConradUnleash Your Imagination with 'The Legend of Pineapple Cove': An Enchanting...

 T.S. EliotFollow ·18.2k
 Elias MitchellFollow ·5k
 Clay PowellFollow ·15.4k
 Dan HendersonFollow ·17.6k
 Carlos FuentesFollow ·11.7k
 Harold PowellFollow ·8.6k
 Neil ParkerFollow ·11.8k
 Samuel Taylor ColeridgeFollow ·10.4k

 Larry Reed
Gwendy's Final Task: A Thrilling Conclusion to a Timeless...
Prepare to be...
 Victor Turner
How FDR Defied Polio to Win the Presidency
Franklin D. Roosevelt is...

 Edwin Cox
Winner RGS BBC Journey of a Lifetime Award: An Inspiring...
In the heart of the world's...
 Dustin Richardson
 Griffin Mitchell
Everything You Need to Know, You Learned From Mister...
Mister Rogers' Neighborhood was a beloved...
 Beau Carter
Seasons of Terror: A Spine-Tingling Odyssey into the...
In the realm of horror...
4.1 out of 5
| Language | : | English |
| File size | : | 9489 KB |
| Text-to-Speech | : | Enabled |
| Screen Reader | : | Supported |
| Enhanced typesetting | : | Enabled |
| Print length | : | 128 pages |
